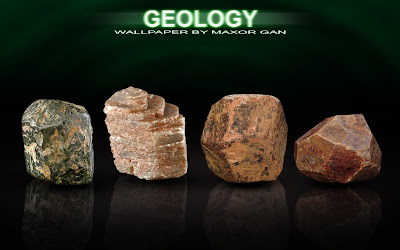
Wallpaper of the day - Only 4 source images is used (the left 2 corundums and right 2 garnets).
The rest I did it manually in Photoshop, after discovering the technique of creating spheres
with shadows and reflection.
For most people, Photoshop is an image editing software where you combine 1 or more source images (photos, stock images, pictures from internet, etc), modify them, add in information and make them into a new piece of image. Or many people prefer to use Photoshop to retouch photos.
But now I gonna teach you to go beyond what other people normally do. I'll show you how to create images instead of modifying, and here is the 1st tutorial, one of the simplest.
TUTORIAL 1
3D sphere in 5 minute. Sound kinda impossible? I'm gonna unveil the mystery layers by layers so for those who are still new you'll know what is going on with the "Layer" feature in Photoshop, a very powerful gifts in graphic designing. There is no 3D functions, preset filters, or add-ons involved.
STEP 1
Not big deal. Create a grey circle like this. There are many ways to create a circle. I prefer to use the Pen Tool to create shape.
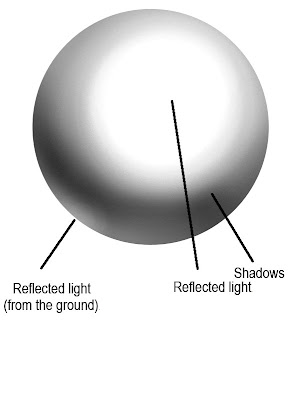
Now make it 3D. How?
This is the tricky part. You need to add tones to the plain circle using your mouse. I do recommend you to use the Dodge and Burn tool. Dodge is to lighten it while Burn is to darken it. The upper part should be brighter as light if reflected and the lower part, darker. To make it more realistic add a little reflection at the edge near the ground. Step 2 would just be a piece of cake if you are talented. =)

STEP 3
Now its time to add shadow. We add it manually.
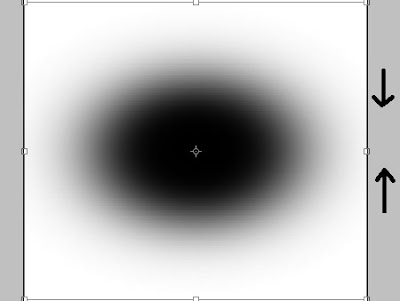
Create a feathered-edge black circle. For me, I use the Brush Tool with large diameter and 0% hardness. And dot one on the canvas. Then proceed to transform it (CTRL + T). Compress the feathered circle into oval shape.

STEP 4
Place the shadow behind the ball so it look like this. Adjust it till it is right at the bottom of the ball. You are not done yet anyway, only for the 3D part. For skilled people this takes only 30 seconds. (by aids of shortcut keys, of course)
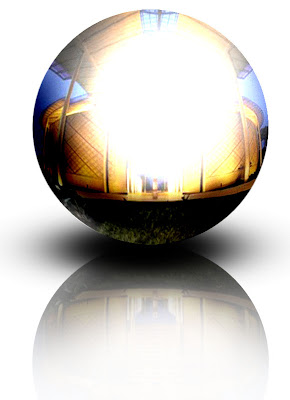
Copy and paste the 3D sphere layer so you have 2 layers (CTRL + J). Transform and flip the copied sphere vertically (along the x-axis) so it resembles the mirror image of the 1st sphere (Edit->Transform->Flip Vertical). Then adjust its position till they touch end to end at the bottom. Use Eraser tool (E) to fade the bottom part of the reflected sphere with uniform gradient. The eraser should be feathered, i.e. 0% hardness. Tada...you are done! Congratulations. Wait a second, maybe you want it to look metallic instead of a gypsum plaster?
Now get a source image. In this case I have took a picture. (Chancellor Complex of University of Technology Petronas) This photo would gonna be the reflected environment in the sphere. DONT use your photo else you wanna see how funny your face got distorted! xD
Use the liquefy filter to make it appear reflected on a spherical surface. (though I prefer to use warp transform) Then crop out the part. Place the cropped image behind the sphere. Then apply Linear Light mode to the Sphere layer so it looks like this. Repeat the same thing for its reflection and you are done!

DISCLAIMER.
I shall notify that all tutorials and materials that had been used here are very original. No other tutorials from other sites is pasted, nor referred. Every ideas are original.


This is amazing.
ReplyDelete